One thing that is tricky to learn in creating custom vinyl designs is layering the heat transfer vinyl. There are always many questions around this topic. For example: Can we do layering on regular HTV? Can we do layering on glitter HTV? Etc. Then Let’s go with how to layer heat transfer vinyl.
Some enclosed is a quick list. It contains some tips to and answers to the vinyl layering questions.
1.Regular HTV (smooth htv) can be layerd for upto 4 layers.
2.Specialty vinyl like glitter, hologram, flock etc. can only layer on regular HTV.
3. You can not layer glitter over glitter or flocked over flocked. but It is likewise for other specialty vinyls too.
4. Specialty HTV cannot be the base for regular HTV. However, regular HTV can use as a base for specialty HTV
5. Then, the layering in point number 4 is limited to 2 layers only.
Layering HTV on cotton
· Cutter
· Cutting mat
Steps
1. Make design setup
In the design space canvas, open the design and then scale it to fit your garment.

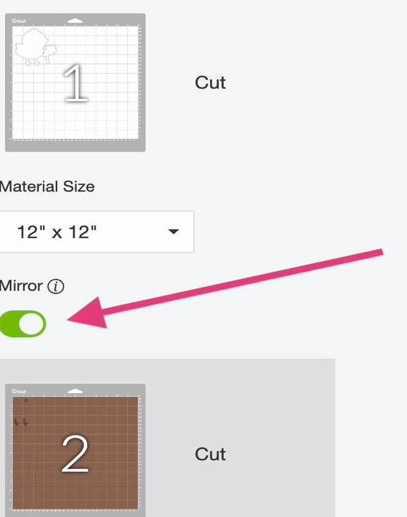
2. Then make sure that the design has the mirror setting checked.
3.Later then cut and weed: HTV is cut in reverse.So, make sure to load the vinyl sheet into the cutter with the shiny (color) side facing down and the adhesive side up. Then continue to load and cut until each layer has been cut.

4.Heat press or iron the images:
Then start applying with the base layer of the design. Press every layer individually after pressing and peeling the previous one carefully. Then make sure to place the next layer correctly on top of the base layer of the design.

5. Adding on glitter HTV
Then mow, on this design made out of regular HTV so far, we can add a layer of glitter HTV.
6. Make sure while cutting the glitter HTV design the mirror setting is turned on . Then change the material type in the cutter to glitter iron on. Cut and weed ad discussed above.

7. As a final step
Turn the garment inside-out and press for 20 seconds. This will make the adhesive on the vinyl adhere well and take out any lines created by the clear sheets. Now you know how to layer heat transfer vinyl.
Leave a Reply