One of the most popular ways to do DIY with heat transfer vinyl is making customised wood signs. And an easier way to do so is with sign vinyl stencils. So, in this article, we will learn the steps to paint wood sign with sign vinyl stencils. Here we introduce DIY – Paint Wood Signs with Sign Vinyl Stencils.
But first, What is sign vinyl?
Sign vinyl is like a large sticker. The backing with adhesive and you can apply it to different surfaces. You can apply this vinyl to any surface, whether flat or curved. Thus, it is ideal to use in wood DIY projects that have an uneven surface. It comes in various types and colors. We can use it’s sticker like quality to make a stencil for the paint.
Materials Needed
· wooden piece to customise
· Weeding Pick
· Squeegee
· Paint
Steps to paint wood sign with sign vinyl stencils
1. Cutting the design
For applying the design in this DIY, set the cut setting to mirror in your cutter. If you are cutting yourself then make sure the design is a in mirror image. If the design is in paint, then the design needs weed away extra parts to make the stencil for the painted design. And if everything except you want to paint the design, then the part on the vinyl surrounding the design goes away.
2. Weeding
In order to weed precisely, without botching the design, You can print a reference final look on a paper. That actually helps to be on track with what exactly needs to kept and weeded away and what goes where.
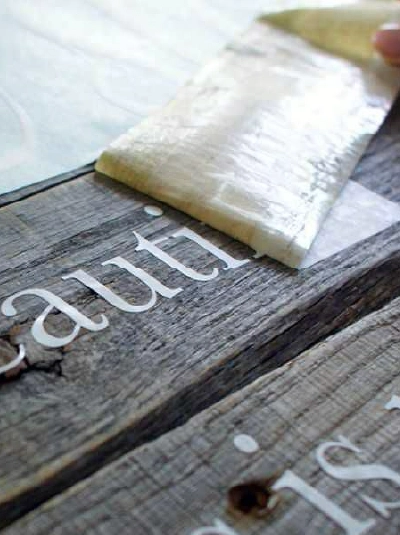
3. Masking the sign vinyl
After weeding properly, mask the vinyl using a paper masing tape. We are doing this step to properly transfer the vinyl onto the wooden board. And also, it’ll keep the design properly in place when you remove the vinyl backing. So the mask will act as a carrier sheet after the original one is removed. Use a squeegee to apply the mask properly and make sure no air bubbles are trapped.
4. Applying the design to the wood
Now that the makes has been applied to the design, it’s time to very carefully place the design on to the wood. To place it in a straight, aligned way, you can use a measuring tape or a scale. If the wood is very uneven, then start applying the design from the centre and move out to the ends. Use a squeegee to further press the vinyl on to the wood. This will make sure the vinyl sticks to the wood and then the masking can be removed.
5. Paint over the vinyl
Now, paint wood sign with sign vinyl stencils by applying thin layers of paint to the place according to the design. Make sure the strokes are long and even. And take a little paint at a time so that the lines remain crisp.
6. Lastly, Remove the vinyl
The vinyl is ready to be removed once the paint is completely dry. Use something sharp like a knife to keep the lines clean.
And your very own customised wooden sign is ready!
Leave a Reply